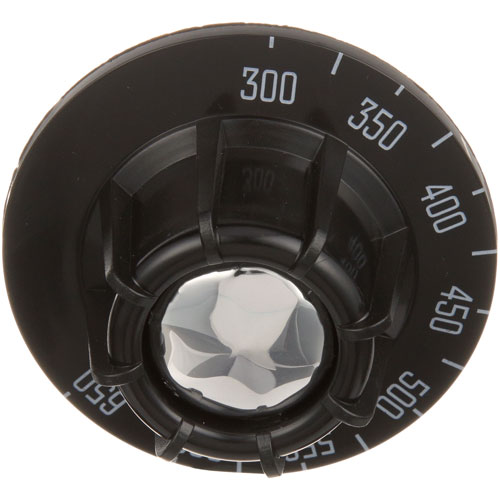

Garland GL1017508 Dial 2-1/2"DIA 300-650°F
Specifications:
- Black W/White Print Dial For Fd T'Stat
- [ 2-1/2" Dia ] [ 300-650] [Mount .290"] [ Flat Down ]
- Bakers Pride Oven 104P, 151, 204P, 251, 304P,351, 404P,
- 451,922, 932, Y600, Y612. Series: 805, D125.
- Blodgett Oven Pizza Ovens: 999, 1000, 1048, 1060-Fai.
- Series: 900 Roast & Bake.
- Lincoln Oven Series: 1000, 1200.
- Montague Oven 13P-1, 14P-1, 23P-2, 24P-2.
- Vulcan Oven Gh3/72, Gh3/72C, Gh3/72S, Gh30, Gh30C, Gh45,
- Gh45/72, Gh56, Gh56S, Gh6, Gh60, Gh60/45, Gh60/72, Gh6045C,
- Gh60T, Gh60T/45, Gh60T/72, Gh6C, Gh6S, Gh6T45C, Gh72,
- Gh72/45, Ghm3/72, Ghm30, Ghm30C, Ghm45, Ghm45/72, Ghm56,
- Ghm6, Ghm60, Ghm60/45, Ghm60/72, Ghm60T, Ghm60T/45,
- Ghm60T/72, Ghm72, Ghm72/45, Lobster
Description
Dimensions:
- Weight: 0.1 lbs
- Length: 2.5 in
- Height: 1.25 in
- Width: 1.25 in
This Part Fits the Following Models
71 modelsStep1: Turn off equipment and allow the unit to cool completely before starting.
Step2: Remove the old thermometer by loosening the mounting nut carefully.
Step3: Clean the mounting hole and surrounding surface to remove residue.
Step4: Insert the new dial thermometer into the opening and align it properly.
Step5: Tighten the mounting nut securely without over-tightening.
Step6: Power on the unit and verify an accurate temperature reading.
Customer Reviews
No reviews yet. Be the first to write one!
Write a Review
We strive to provide our customers with a hassle-free and efficient shopping experience. Our shipping policy ensures the timely delivery of your orders and complete customer satisfaction. View More
We are committed to ensuring your complete satisfaction with every purchase. We understand that circumstances may arise where you must return a product or request a refund. If for any reason you are not satisfied, you may return the item(s) according to the terms outlined below. View More
This Payment Policy outlines the terms and conditions governing all payments made for products purchased through our website. By making a purchase, you agree to be bound by this Payment Policy. View More